Install Raspberry Pi Imager which allows you to flash the operating system into the SD card
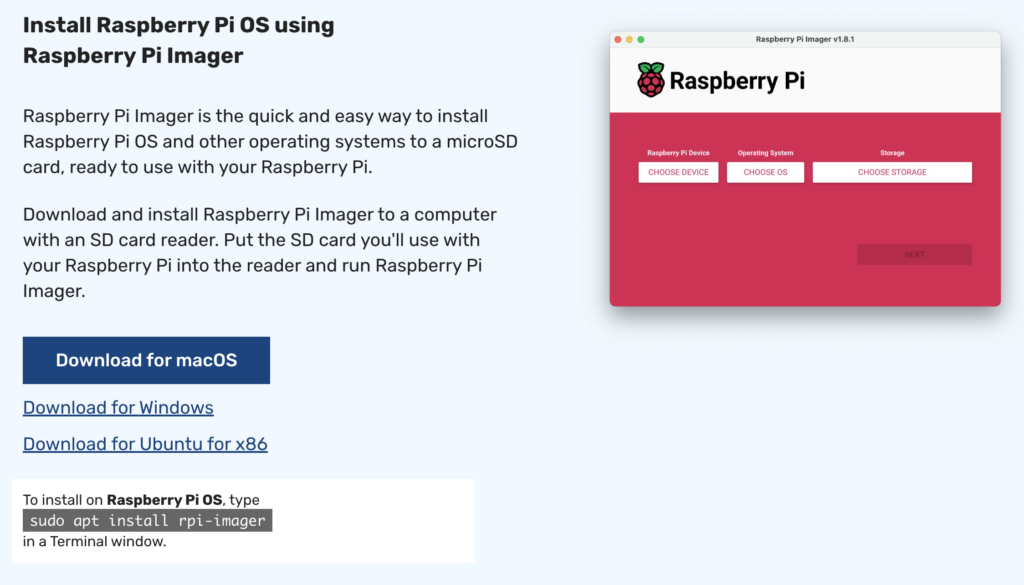
Put the MicroSD card into the MicroSD card port of the computer
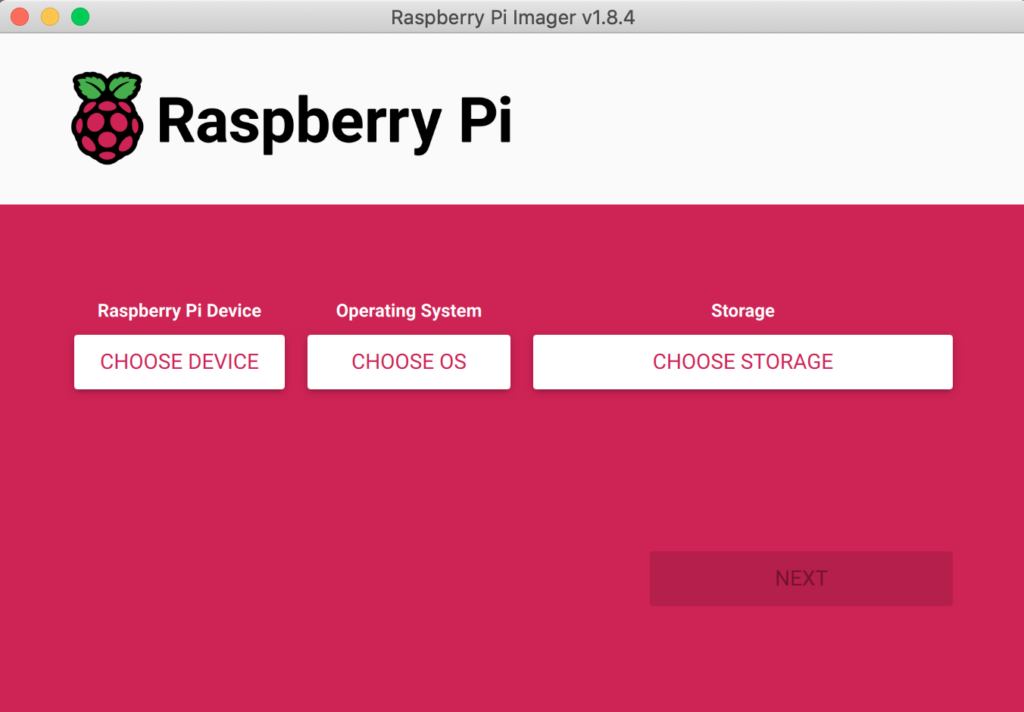
Choose Device: Select the model of Raspberry Pi purchased
Choose OS: Choose the latest operating system
Choose Storage: Select the MicroSD card that was inputted into the computer
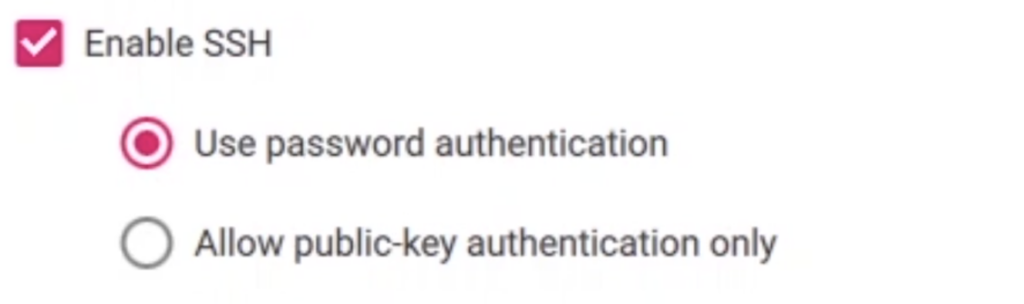
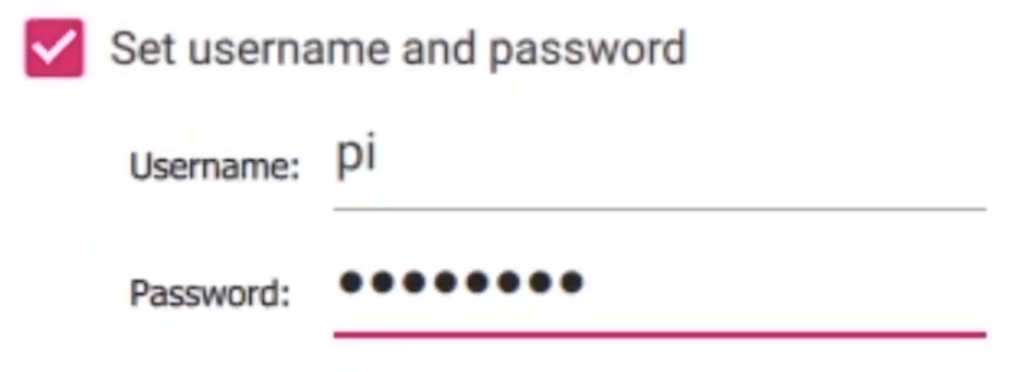
Several Settings need to be configured
Enable SSH: it allows me to get access to the Raspberry Pi remotely without having to add an external monitor.
Set Username & Password: This is used for me to enter the operating system.
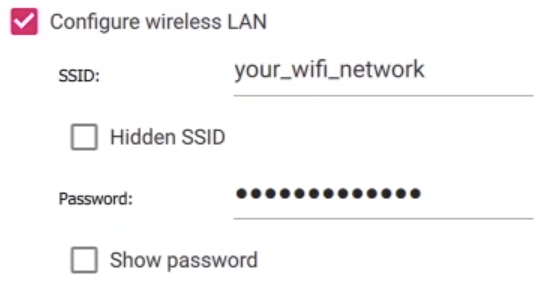
Configure Wireless LAN: Connect the Raspberry Pi to the WiFi. The WiFi it connects to must be the same one as the WiFi the computer is connected to, if the computer and Raspberry Pi are not connected into the same WiFi network, they won’t be able to find each other.
Then start writing the operating system onto the SD card. Take the SD card out of the computer and plug it into the SD card slot on the Raspberry Pi.
Power the Raspberry Pi up using a power supply with at least 5V and 2A.
Find the Raspberry Pi’s IP Adress
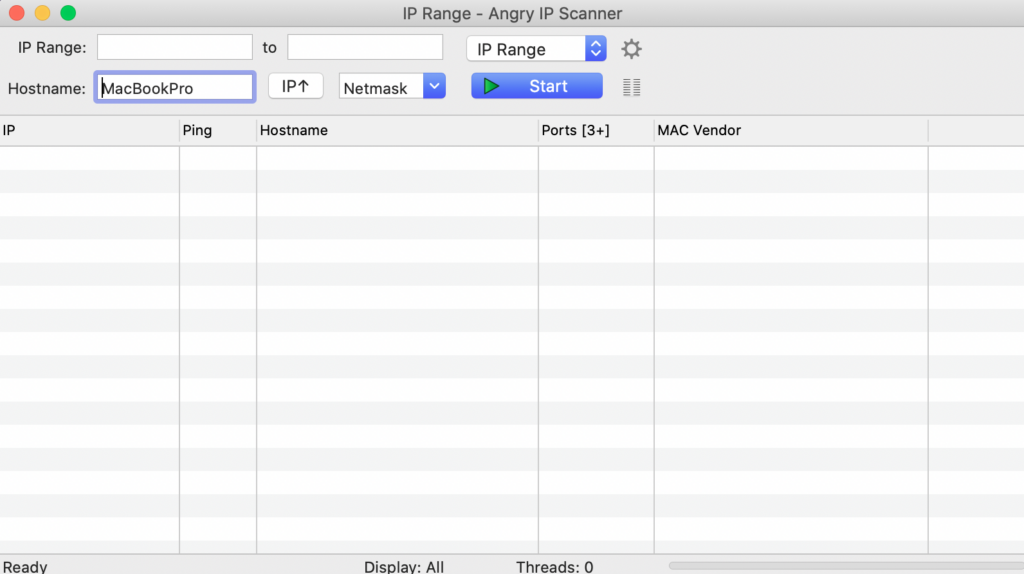
Download Angry IP Scanner, it will scan the network and find the IP addresses on it.

Click on the software, enter IP range and hit start, it will show all the devices that is connected to the network. After it finishes scanning, click on “Ping”, then “Sort by Ping”, all the device found can be shown on the screen. Raspberry Pi’s IP address will be used in SSH (short for Secure Shell, is a secure protocol and the most common way of safely administering remote servers) to take control the Pi.
Open the terminal or command prompt to use command lines to get control of the operating system in the Raspberry Pi.
Type in the command line: ssh pi@192.168.**.**
Format: ssh (username set for the Pi ) @ (the IP address of the Pi found in the scanner)

The computer will ask if I want to continue and enter yes go keep going.

It will then ask for the password for the Raspberry Pi, enter the password set previously.

Now, with the correct password, I will be in it and have the access to the Raspberry Pi. Even thought I am still in the terminal, but the terminal is now connected to the Raspberry Pi SSH.

Setup VNC
Type “sudo raspi-config” in the command line and hit enter to open the configuration of the Raspberry Pi.

First, choose the interface option, and click on the VNC to validate it to enable to VNC server.


Next, choose “System Opeion”, hit “Boot / auto login” and click on “desktop autologin”, it makes sure that I can directly access the desktop, and don’t need to login before.


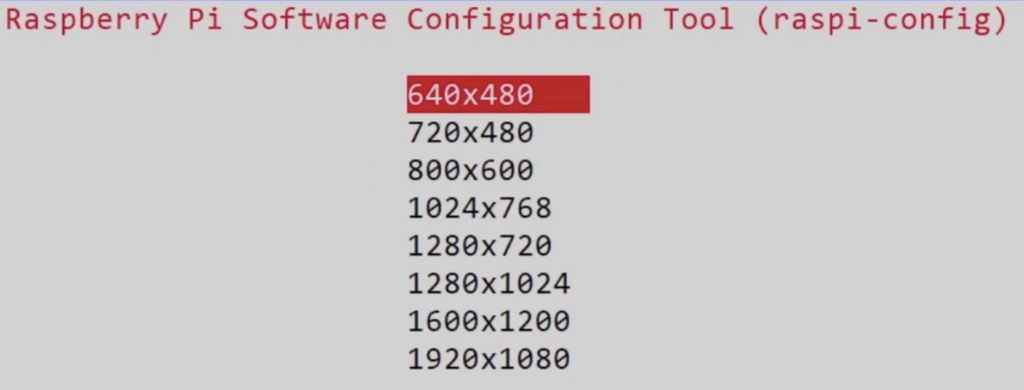
Lastly, choose “Display Options”, hit “VNC Resolution” and click on the resolution that is closer to the resolution on the computer screen.


Finally, click on reboot to restart the Raspberry Pi so that all the settings are ready.

Download VNC Client
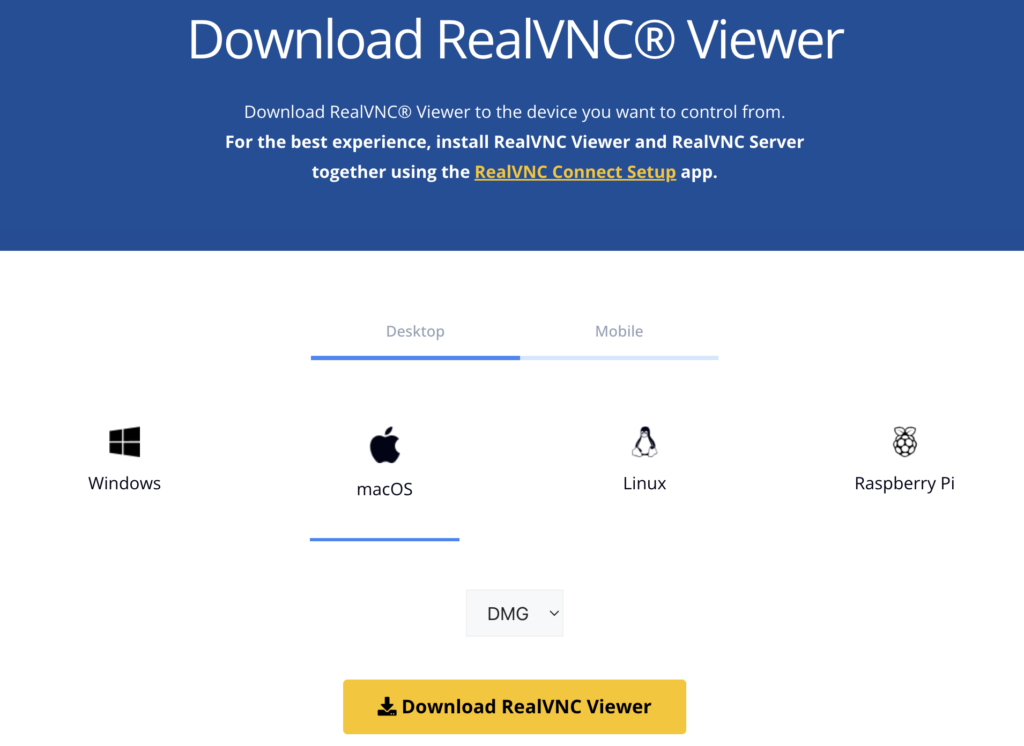
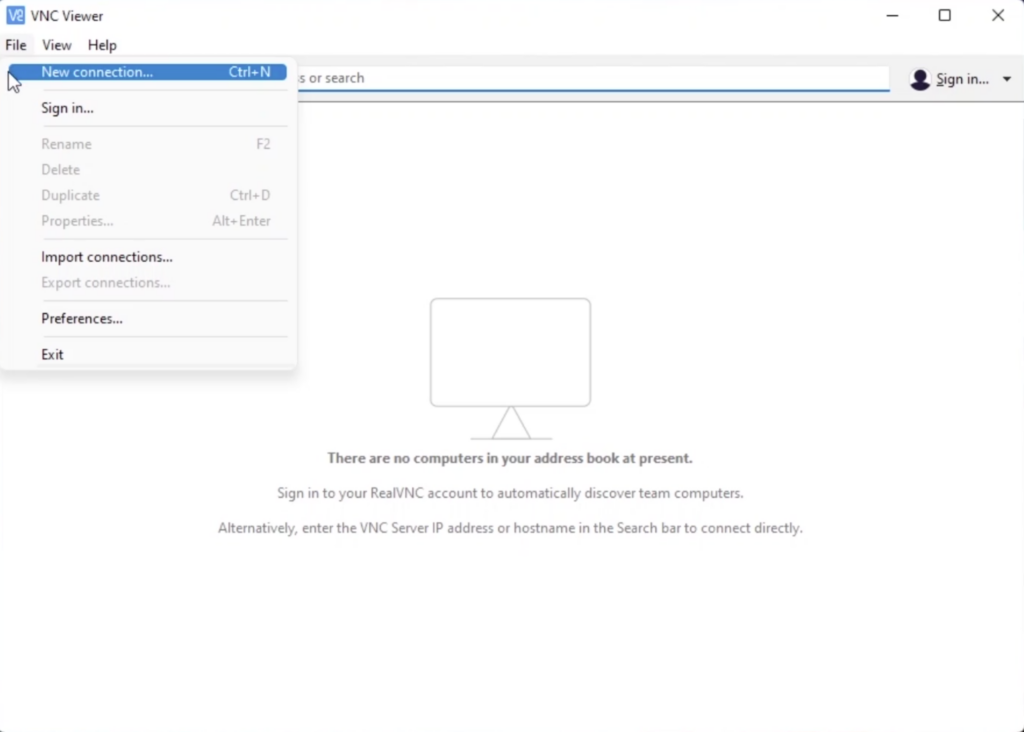
Download the software “RealVNC”, a client connects to and uses the resources of a remote computer or server.
Once the software is downloaded into the computer, open it, click on “file” and then “new connection” to connect to the Raspberry Pi.
Put the IP address of the Raspberry Pi, and give it a name. Click “OK”, now everything is done.
Double-click on the computer to open the VNC
